
SmartPTT allows using SQL Server and Windows NT Authorization modes.
To enable SQL Server Authorization, the user must have the login name and password of the account with SQL server access.
To enable Windows NT Authorization, the user who has logged into the Windows system, must be listed in the SQL server’s list of users to make connection.
When SQL Server was installed by one SQL user but then SmartPTT connects to the database by another user or in similar cases, it can be that SmartPTT does not have enough rights to connect to the database or make records in this database by Windows NT Authorization. In this case SQL Authorization will help. Here are the steps to configure SQL Server Authorization in SQL Server and in SmartPTT.
1) Install SQL Server Management Studio the same version as SQL Server.
2) Start SQL Server Management Studio and connect to SQL Server
3) Right click on Computer_Name\SQLEXPRESS and select Properties.
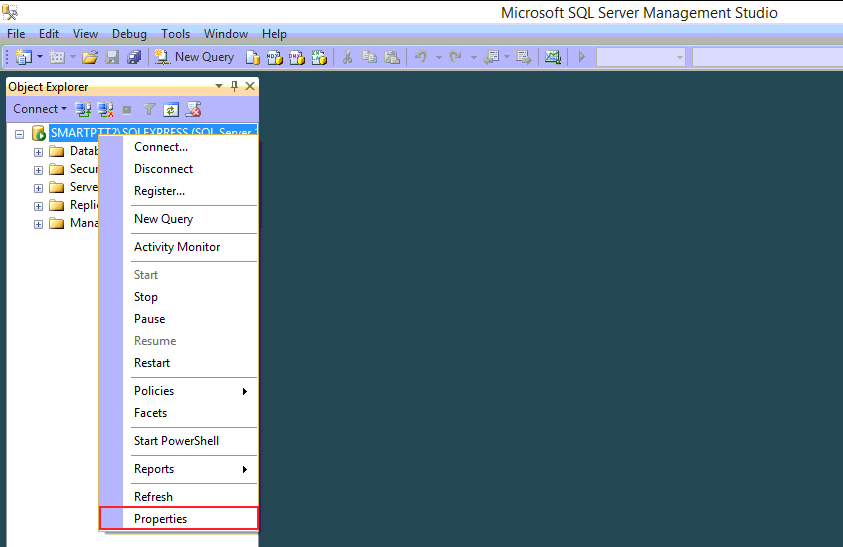
Server Properties window will be opened.
4) In this window go to Security tab and select SQL Server and Windows Authentication mode. Then press OK button.
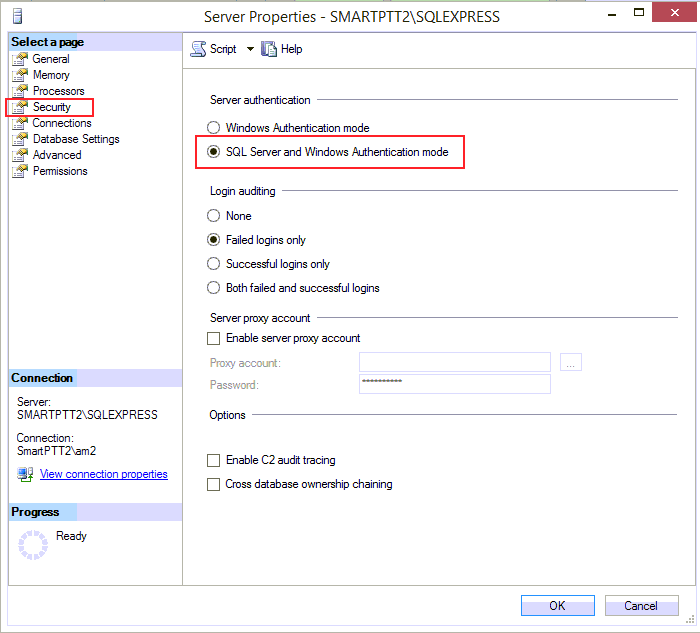
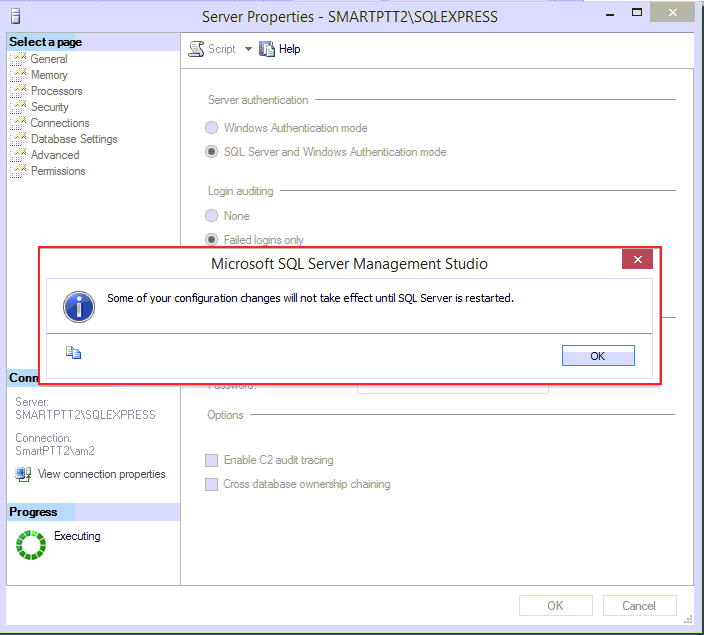
To enable Server work in both Authentication modes, SQL Server should be restarted.
We can restart it later after we add all necessary users and rights.
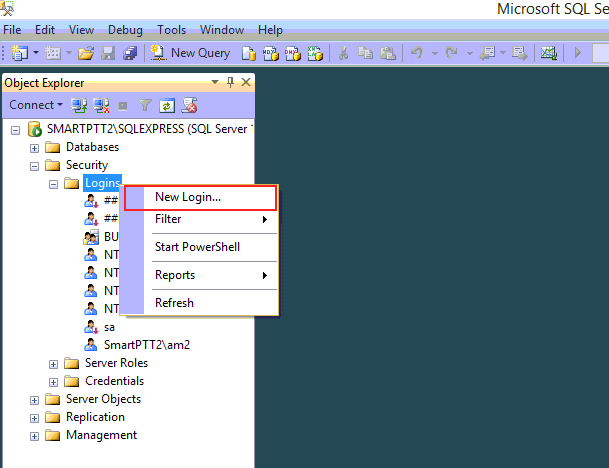
5) Expand Security menu and then Logins menu
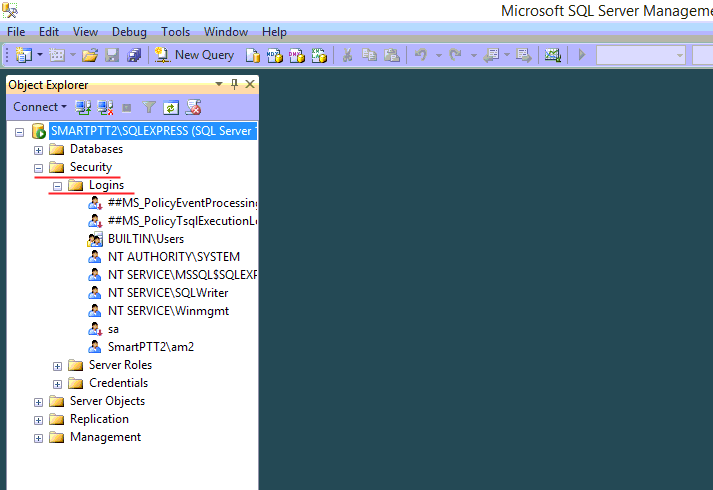
6) Right click on Logins and select New Login.
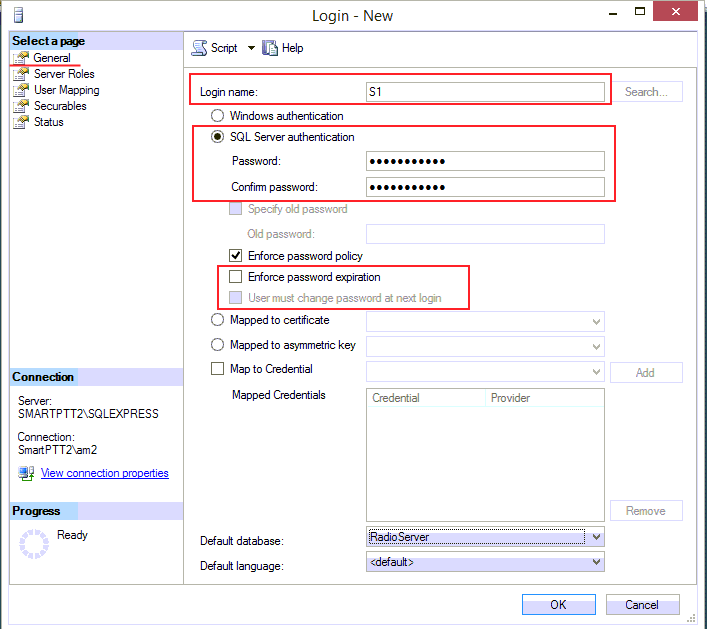
7) In the opened window on General tab:
- Specify Login name: e.g S1
- Select SQL Server Authentication and specify Password.
- Unselect Enforce password expiration
- Select default database, e.g Radioserver
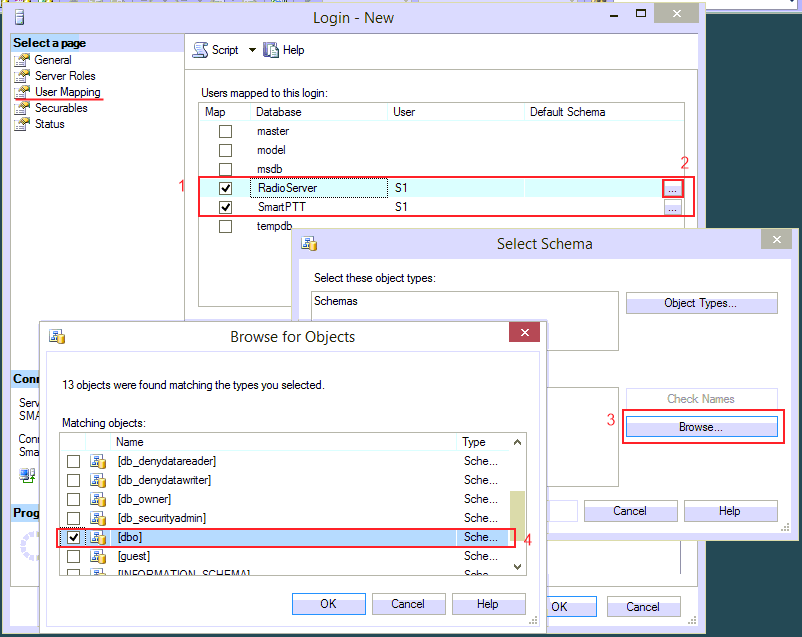
8) In User Mapping tab:
1 - Select databases which will be associated with this user: in the example Radioserver and SmartPTT databases.
2 - Click on ... button to open Schema Window.
3 - Click on Browse... Button to open Browse for Objects.
4 - Select [dbo] and click OK in both windows.
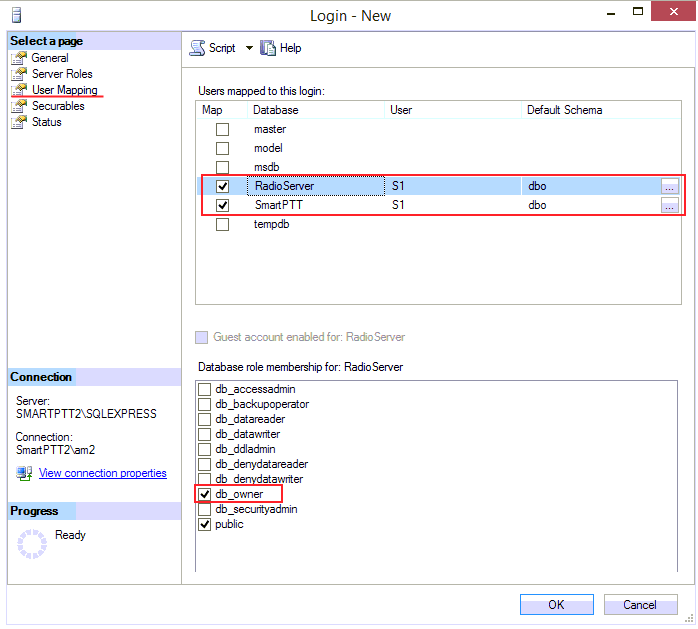
Then you will see that databases are mapped to the created login S1 and have [dbo] Default Schema.
9) In Database role membership window for each database select db_owner. Make sure that both databases have db_owner activated (you need to click on each database separately and select this role). Then click OK to save made settings and close this window.
10) Then in general menu expand Databases -> Database Name (e.g. Radioserver) -> Security -> Users and right click on just created user (e.g S1), select Properties.
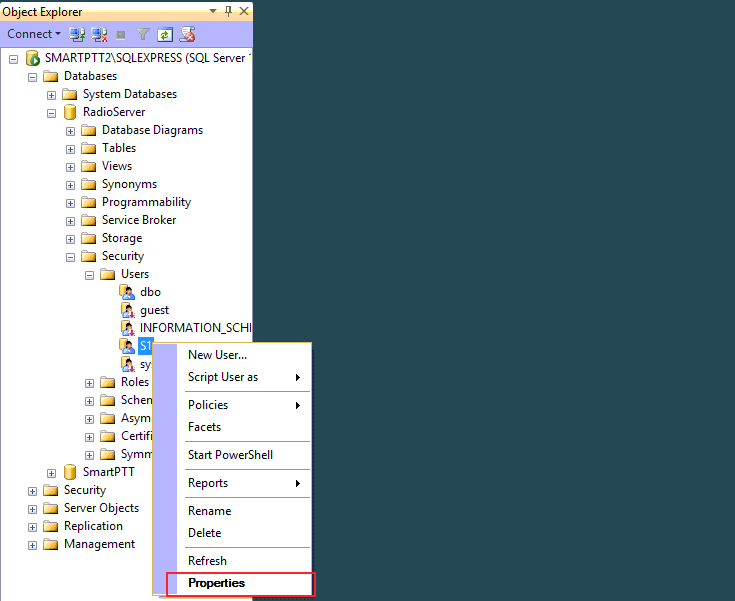
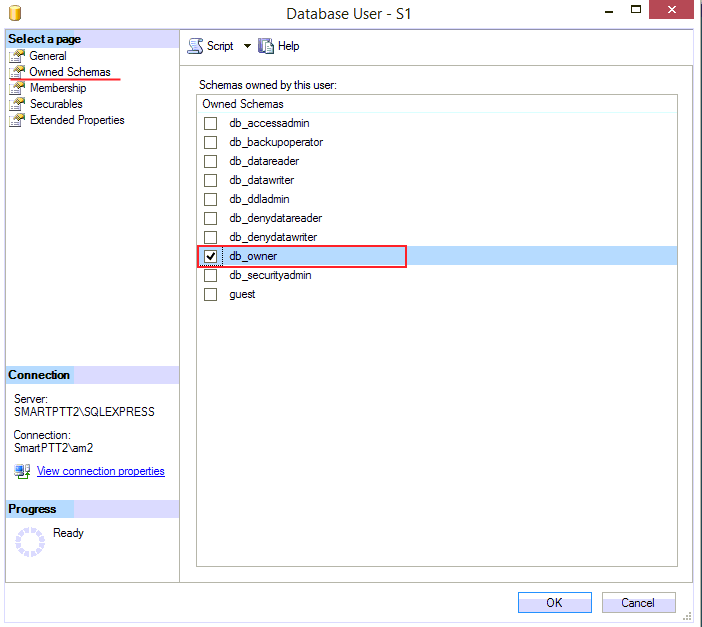
11) In the opened window go to Owned Schemas tab and select db_owner. Click OK to save the settings. Then do the same for the second database if needed.
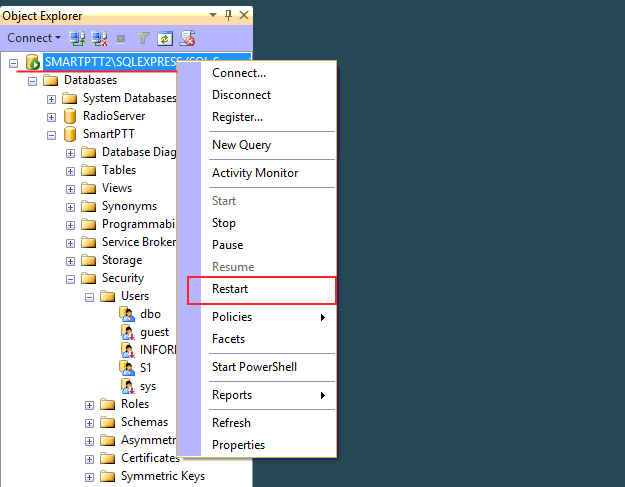
12) To apply all settings to SQL Server, let's restart it.
Right click on Computer_Name\SQLEXPRESS(SQL Server) and select Restart.
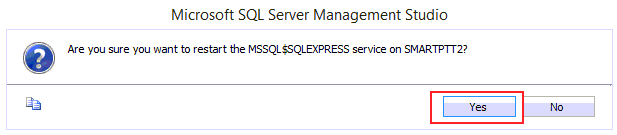
In the opened window click yes to restart SQLEXPRESS Service.
13) Then in SmartPTT Radioserver in Event Log section select Authorization Mode: SQL Server Authorization and specify Login and Password just added to SQL Server.
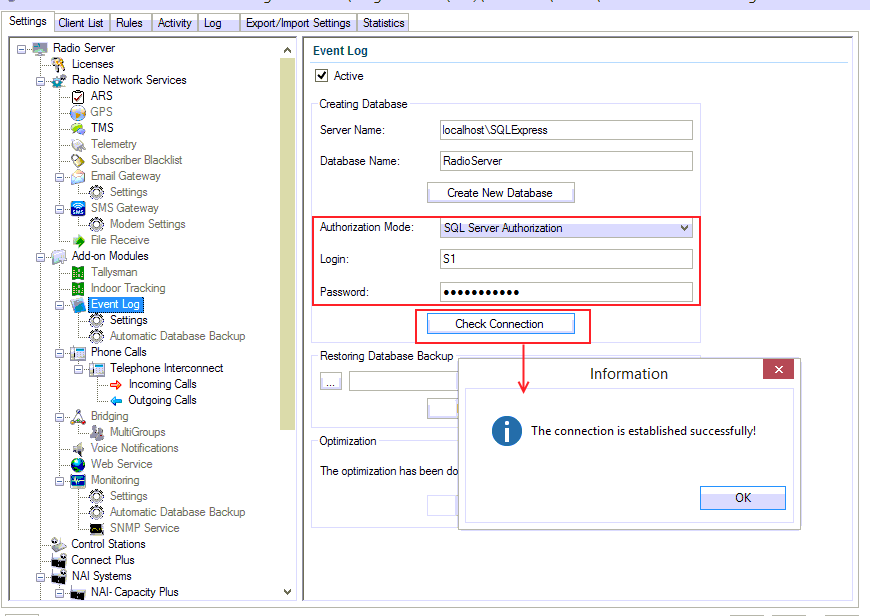
14) Click Check Connection button to be sure that connection is established and when Radio Service is started check that there are no errors in Log tab.
Comments